

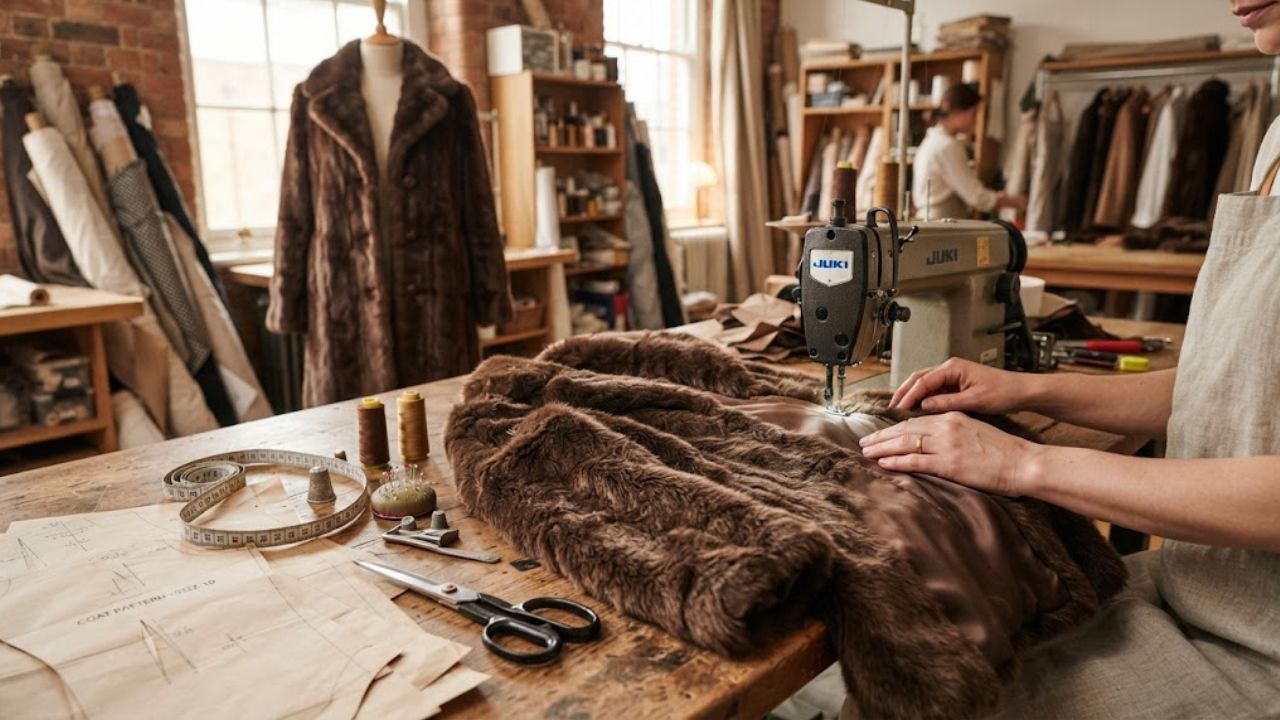
Learning how to sew a fur coat is much easier when you treat faux fur as a specialized fabric rather than ordinary fleece or wool. The pile, thickness, direction, backing and bulk all affect how the finished garment looks and how easily it goes together. For a first project, faux fur is generally the more practical material to work with because it comes in fabric yardage and can be constructed with familiar garment-sewing equipment. Threads’ sewing educator Kenneth D. King has also demonstrated a complete faux-fur jacket construction process covering pattern preparation, cutting, seams, collars, sleeves and lining.
If your goal is a homemade winter coat, the most useful approach is to start with faux fur, a suitable coat pattern and a lining. Real fur pelts require different cutting and joining techniques and are better approached with specialized fur-working experience.
What You Need to Sew a Faux Fur Coat
Before learning how to sew a fur coat, gather the materials and tools you will actually use.
For a basic faux fur coat, you will typically need:
- Faux fur fabric
- A suitable coat pattern
- Lining fabric
- Matching polyester thread
- Sharp scissors or a suitable cutting tool
- Long pins or sewing clips
- Tailor’s chalk or another removable marking method
- Sewing machine
- Hand-sewing needle
- Seam ripper
- Measuring tape
- Zipper, buttons, snaps or another closure
- Optional interfacing or stabilizing material
Faux fur can be thick, so test your machine and thread tension on scraps before beginning the actual coat.
Threads recommends selecting a pattern with relatively simple lines because excessive seams and details can disappear beneath a thick pile.
Choose the Right Faux Fur and Pattern
The fabric you choose has a major effect on the difficulty of the project.
Shorter-pile faux fur is generally easier for a beginner than extremely long, dense fur. Long pile can make cutting, pinning and seam management more difficult.
Think about the silhouette before purchasing fabric.
A simple coat can include:
- Straight body
- Relaxed oversized body
- Slightly fitted waist
- Knee-length silhouette
- Cropped jacket
- Shawl collar
- Stand collar
- Hooded design
For a first project, avoid an extremely complicated pattern with many panels, darts and decorative details.
Your pattern should also provide enough ease for the thickness of the fabric. A pattern designed for a thin woven fabric may fit very differently when made from bulky faux fur.
Step 1: Understand the Nap Before Cutting
One of the most important parts of how to sew a fur coat happens before the sewing machine is turned on.
Faux fur has a nap. This means the fibers lie in a particular direction.
Run your hand over the fabric in both directions. You will notice that one direction usually looks smoother while the opposite direction makes the pile stand differently.
Choose the direction you want and keep every major pattern piece consistent.
Your front, back, sleeves and collar should generally follow the same visual direction unless the design intentionally uses a contrasting arrangement.
Threads and other sewing resources specifically emphasize paying attention to nap direction during layout.
Step 2: Prepare the Pattern
Do not rush directly into cutting the fur.
Make sure the pattern has been checked for:
- Bust and chest measurements
- Shoulder width
- Sleeve length
- Coat length
- Ease
- Collar size
- Pocket placement
- Closure position
If you are uncertain about the fit, make a test garment from inexpensive fabric first.
This is especially important because correcting a poorly cut fur garment can be difficult once the pile has been cut.
For fur, a mistake in cutting is not simply a small sewing mistake. You may have already committed an entire piece of expensive fabric to the wrong shape.
Step 3: Cut Faux Fur Carefully
Cutting is one of the most important skills in how to sew a fur coat.
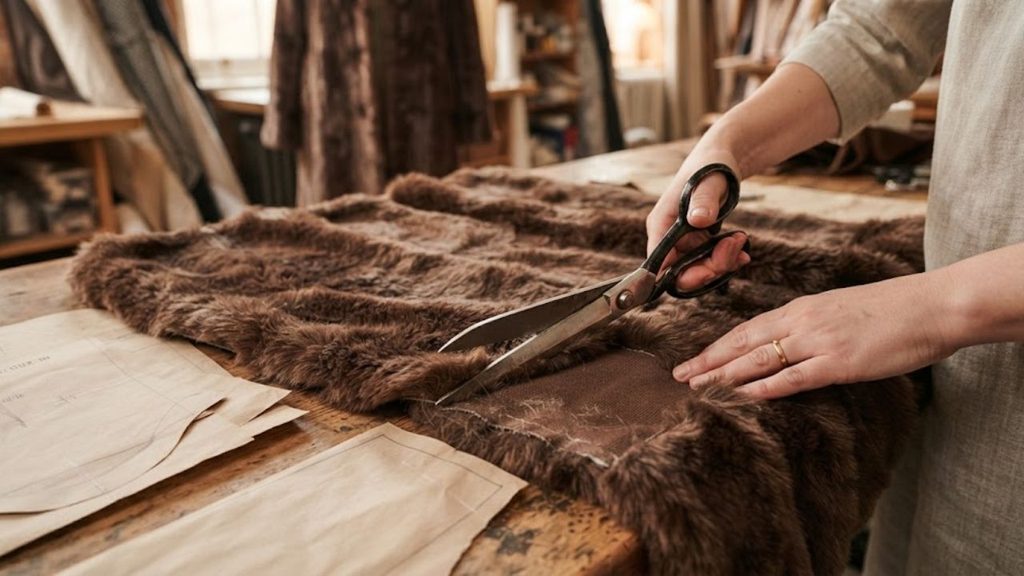
Place the faux fur with the backing facing upward. Mark your pattern on the backing rather than drawing heavily across the fur itself.
Whenever possible, cut in a single layer.
Instead of cutting straight through a thick pile with scissors, carefully separate the backing and cut through the backing material. This helps preserve the fibers along the cutting edge and reduces unnecessary fur loss.
Threads’ sewing guidance specifically recommends careful cutting through the backing and keeping the pile intact.
Cut slowly around:
- Front panels
- Back panels
- Sleeves
- Collar
- Facings
- Pocket pieces
- Hood pieces
If the fur sheds heavily, expect loose fibers during cutting. Keep a lint roller or vacuum nearby and clean your workspace as you go.
Step 4: Mark the Pieces Clearly
Once the pieces are cut, mark them.
This sounds basic, but it becomes particularly useful when several large pieces look almost identical.
Mark:
- Center front
- Center back
- Shoulder
- Sleeve front
- Sleeve back
- Collar placement
- Pocket placement
- Nap direction
You can also mark matching points between the pieces.
A small arrow showing the nap direction can prevent one of the most frustrating mistakes: sewing one sleeve in the opposite direction from the rest of the coat.
Step 5: Control the Bulk at the Seams
Faux fur can become surprisingly bulky where several layers meet.
This is why how to sew a fur coat is not simply a matter of putting two pieces together and running them through a machine.
Depending on the fabric, some seam allowances may need to have excess pile carefully reduced.
The goal is not to remove the visible fur from the garment. It is to reduce unnecessary bulk where multiple layers overlap.
Threads demonstrates specialized seam techniques for faux fur, including methods for controlling bulk and keeping the pile from becoming trapped inside the stitching.
Before committing to a technique, test it on a scrap.
Step 6: Sew the Main Coat Sections
Start assembling the main body according to the pattern instructions.
A typical sequence is:
- Sew the front sections if required.
- Join the shoulders.
- Assemble the sleeves.
- Attach the sleeves to the body.
- Sew the side seams.
- Construct the collar or hood.
- Attach the collar or hood.
- Add pockets.
- Install the closure.
- Construct and install the lining.
The exact order varies according to the pattern.
Use clips or suitable pins to keep thick layers aligned. Faux fur can shift while being fed through a sewing machine, particularly when the backing is slippery or stretchy.
Threads’ recent faux-fur sewing guidance also notes that clips can help control layers during stitching.
Step 7: Keep the Fur Out of the Seam
As you sew, some fibers will naturally try to become trapped inside the seam.
Before stitching, push the pile away from the seamline.
After sewing, use a needle, awl or similar tool to gently pull trapped fibers back toward the outside of the garment.
This small step can make a significant difference.
A clean seam should look as though the fur naturally continues across it rather than showing a thin, flattened strip.
Do not aggressively pull the fibers. Work gently so you do not damage the backing.
Step 8: Add the Collar, Hood and Pockets
Collars and pockets require more attention because several layers can converge in a small area.
For a faux fur collar, consider the overall bulk before construction. A large fluffy collar can become visually heavy if the coat already has a thick pile.
A hood needs enough room to accommodate both the head and the thickness of the fabric.
Pocket construction should also account for pile direction.
Threads’ faux-fur construction lessons cover fabric-faced collars and pocket flaps specifically, including techniques for managing the pile between the fur and lining.
Step 9: Install the Lining
A lining can make a homemade faux fur coat look significantly more finished.
It also creates a smoother interior surface, making the coat easier to put on over sweaters and other winter layers.
Construct the lining separately according to your pattern, then connect it to the coat at the appropriate edges.
Pay attention to:
- Neckline
- Front opening
- Sleeve hems
- Coat hem
- Ease
- Lining attachment points
Do not pull the lining too tightly. It needs enough movement to allow the outer coat to hang correctly.
Threads’ complete faux-fur jacket series includes lining construction and installation as part of the overall garment-building process.
Step 10: Finish the Hem and Closures
The final stage of how to sew a fur coat is finishing the areas that receive regular use.
Choose closures according to the design:
- Zipper
- Buttons
- Snaps
- Hooks
- Toggles
- Belt
Make sure the closure is supported properly. A heavy faux fur coat can place more stress on the front opening than a lightweight garment.
The hem should also be checked from the outside before final stitching.
Look at the coat while it is hanging naturally. Make sure the hemline is even and the pile is not trapped underneath.
Can You Sew a Real Fur Coat at Home?
This is where the phrase how to sew a fur coat needs an important qualification.
Real fur and faux fur are not constructed in exactly the same way.
A real fur coat is generally assembled from individual pelts, and the hide side requires specialized handling. Professional furriers may use specialized cutting tools, furrier machines and techniques such as skin joining and more complex pelt layouts.
The quantity, size, color and direction of individual pelts also affect the final design. Specialized fur-making references describe much more involved cutting and pelt-layout considerations for mink garments.
For a home sewing project, faux fur is therefore the more accessible starting point.
Common Mistakes When Sewing Faux Fur
Avoid these mistakes if you want your first coat to look polished.
Cutting the pile with scissors
Cutting through the entire pile can create unnecessary shedding and shorten the fibers around the edge.
Ignoring nap direction
A coat can look noticeably inconsistent if one panel is cut against the direction of the others.
Choosing an overly complicated pattern
Too many seams can disappear into the pile while making construction harder.
Skipping a test piece
Always test your stitch, tension, presser foot and seam technique on scrap fabric first.
Forgetting about bulk
Collars, hems, cuffs and overlapping seams can become much thicker than expected.
Using heat carelessly
Do not assume that faux fur can tolerate the same heat as ordinary fabrics. Test the manufacturer’s care instructions before applying heat or pressing.
Can Beginners Learn How to Sew a Fur Coat?
Yes, but your first project should be deliberately simple.
A beginner-friendly faux fur coat might have:
- A relaxed silhouette
- Minimal seams
- Simple sleeves
- A straightforward collar
- Basic pockets
- A simple front closure
- A separate lining
Start with a manageable design instead of trying to recreate a highly tailored luxury coat on your first attempt.
The construction becomes much easier when the pattern, fabric and sewing technique work together.
Faux Fur vs. Real Fur for a DIY Coat
For most home sewing projects, faux fur offers practical advantages because it is supplied as fabric rather than individual animal pelts.
Threads describes synthetic fur as relatively light and demonstrates that many traditional fur-construction techniques can also be adapted to synthetic materials.
Faux fur also gives you access to a wide variety of:
- Colors
- Pile lengths
- Textures
- Animal-inspired patterns
- Mink-style finishes
- Shaggy finishes
- Teddy textures
That makes it easier to experiment with a cropped faux fur jacket, long coat, vintage-inspired silhouette or statement winter piece.
Styling the Finished Coat
Once you’ve learned how to sew a fur coat, the next question is how to wear it.
The answer depends heavily on the silhouette.
A cropped faux fur jacket can work with high-rise jeans and boots because the shorter hem maintains a clear waistline.
A long faux fur coat can become the dominant piece of an outfit, so streamlined trousers or a simple dress can keep the proportions balanced.
If your finished piece resembles mink, you can also use our internal guide, How to Wear a Mink Coat: 9 Modern Ways to Style It, for outfit ideas involving jeans, dresses, trousers, boots and more. The guide explains how coat volume, texture and silhouette affect the rest of an outfit.
Why Faux Fur World Focuses on Accessible Fur Fashion
At Faux Fur World, our focus is faux fur coats, faux fur jackets and winter outerwear.
Our brand positioning is simple: we aim to be the most affordable in the premium faux fur market.
For readers interested in making their own coat, sewing is one way to understand the construction behind the outerwear they buy. For readers who prefer a finished garment, exploring ready-made faux fur jackets and coats can provide a simpler route to the same winter aesthetic.
The important distinction is that this is a brand positioning statement, not an independently verified market ranking.
Final Thoughts
Learning how to sew a fur coat is mostly about controlling the details that make fur different from ordinary fabric.
Choose the pattern carefully. Check the nap before cutting. Work from the backing. Cut slowly. Test your machine settings. Keep pile away from seamlines. Control bulk. Add the lining carefully and finish the closures securely.
For a first project, faux fur is the sensible place to start. It lets you practice the visual language of fur outerwear without having to master the specialized construction techniques associated with real pelts.
And once the sewing is finished, the project does not end at the hem. The way you style the coat determines whether it feels formal, casual, vintage, modern or distinctly your own.
Frequently Asked Questions
Q. Can you sew faux fur with a regular sewing machine?
Yes. Faux fur can be sewn with a household sewing machine, although the appropriate needle, stitch length, presser foot and tension can vary by fabric thickness. Always test on scraps first.
Q. What is the easiest fur to sew for beginners?
A shorter-pile faux fur is generally easier to manage than very long, dense faux fur because it creates less bulk around seams and is easier to cut and control.
Q. Which way should faux fur face on a coat?
Choose one nap direction and keep the major pattern pieces consistent. The pile should normally flow in the same visual direction throughout the garment.
Q. Can you make a fur coat without lining it?
You technically can, depending on the pattern and intended construction, but a lining can provide a cleaner interior and make the finished coat easier to wear over other clothing.
Q. Is sewing real fur different from sewing faux fur?
Yes. Real fur is commonly constructed from pelts and requires specialized cutting and joining techniques. Faux fur is supplied as fabric and is generally more accessible for home sewing.




[…] If you’re interested in garment construction and want to learn another useful clothing skill, you can also explore our guide on How to Sew a Fur Coat. […]
Comments are closed.